How to Install the Job Recruiter Divi Layout
Step-by-Step Guide for Implementing Job Recruiter Divi Layout on Your Website

File Structure
After the purchase of the Job Recruiter Divi Layout, you’ll get the following file.
1. jobrecruiter-layout-import-divi-library.json
2. Style.css
3. Script.js
4. License.txt
Installation Steps:
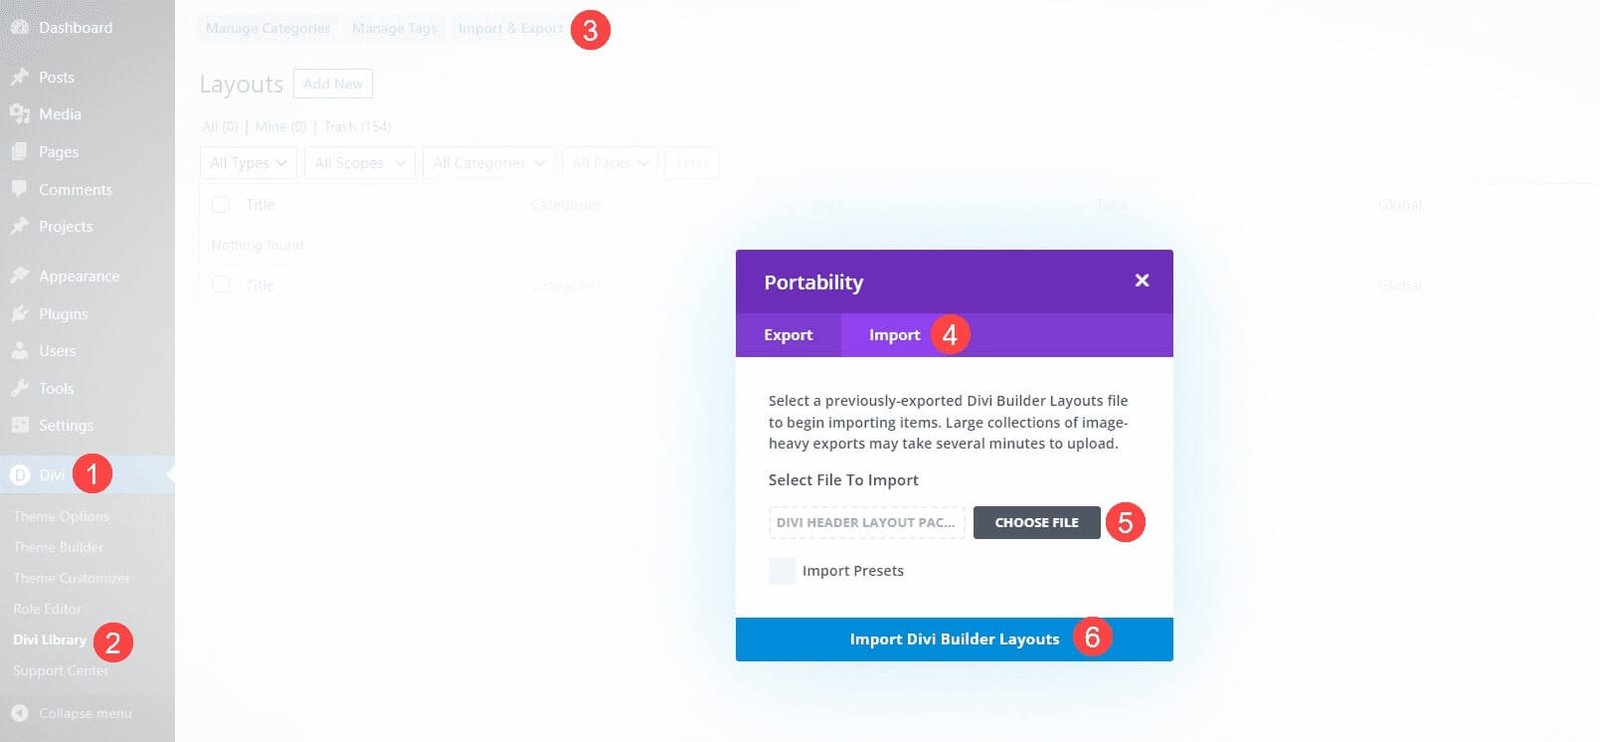
Step 1: Import JSON File to Divi Library
2. Go to Divi > Divi Library
3. Click on Import & Export and select “Import”
4. Choose the JSON file named “jobrecruiter-layout-import-divi-library.json“
5. Click the “Import Divi Builder Layouts“ button
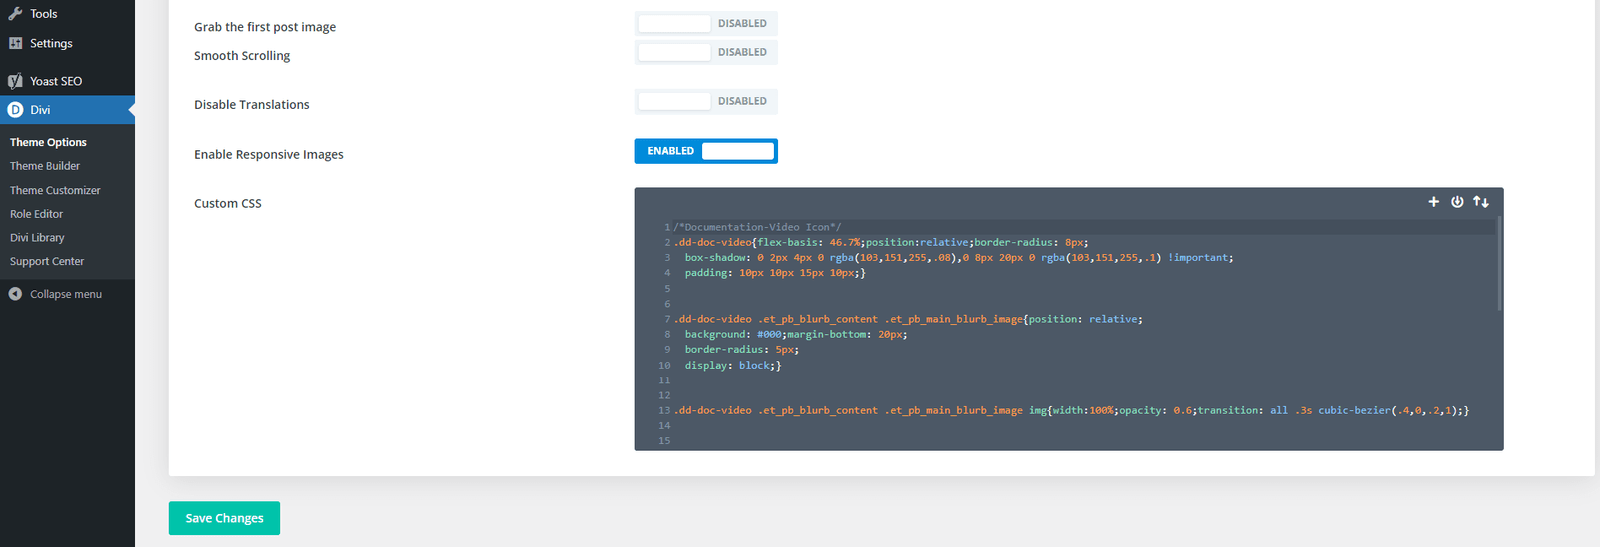
Step 2: Add Custom CSS
1. Go to your WordPress Dashboard
2. Navigate to Divi > Theme Options
3. Scroll down to find the Custom CSS box
4. Copy the CSS code provided in zip file (style.css)
5. Paste the CSS code into the Custom CSS box
6. Save changes
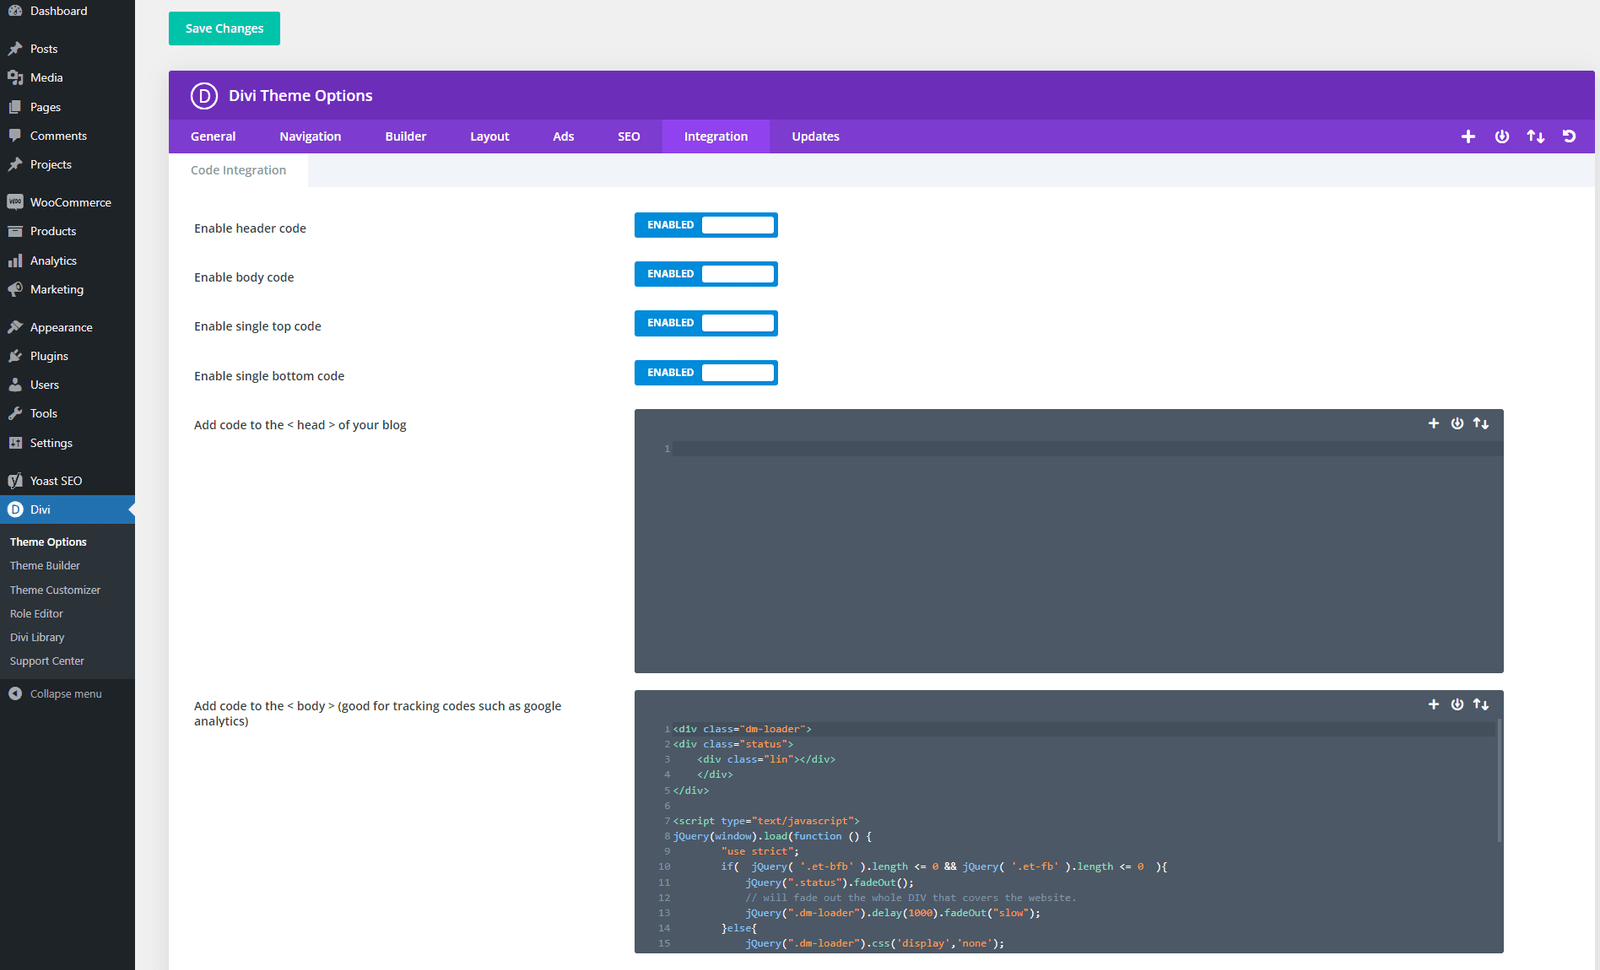
Step 3: Add Custom JavaScript
2. Navigate to Divi > Theme Options
3. Click on the Integration tab
4. Copy the JS code provided in zip file (script.js)
4. Paste the JS code into Body area
5. Click on “Save changes“
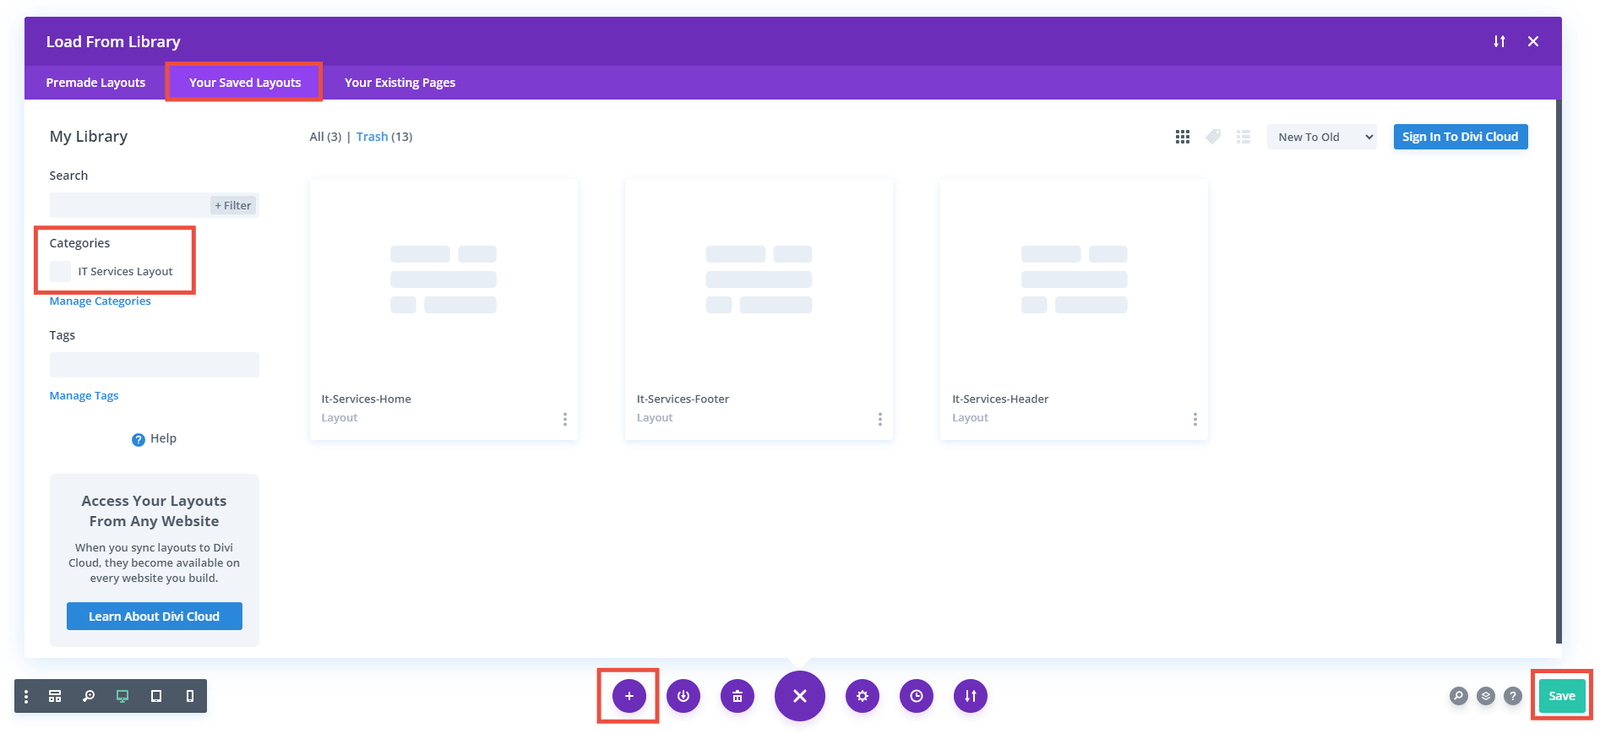
Step 4: Import Page from Divi Library
2. Click on “Edit With The Divi Builder”
3. At the bottom of the page, click on the “Three Dots(…)” icon and select the “Plus(+)” icon.
4. Choose “Your Saved Layouts” and select the desired layout(JobRecruiter-Home.Json)
5. Click on “Save” Button
Step 5: Import Header and Footer in Theme Builder
1. Go to Divi > Theme Builder
2. Click on “Add Global Header”
3. Choose “Add from Library”
4. Select “Your Saved Layouts“ and select your Header Layout (JobRecruiter-Header.json)
5. Click the “Save Changes” button
For Footer :
1. Go to Divi > Theme Builder
2. Click on “Add Global Footer”
3. Choose “Add from Library”
4. Select “Your Saved Layouts“ and select your Footer Layout (JobRecruiter-Footer.json)
5. Click the “Save Changes” button
Frequently Asked Questions
Problems importing the layout?
If the importing process stops at 100%, or you have another problem, please make sure that you deactivate security plugins like Word fence while importing. Then it should work fine.
How to Create a Primary Menu for Your Website?
- Navigate to Appearance > Menus from the WordPress Dashboard
- Enter a menu name
- Under Menu Settings, set the Display location to Primary Menu
- Click Create Menu
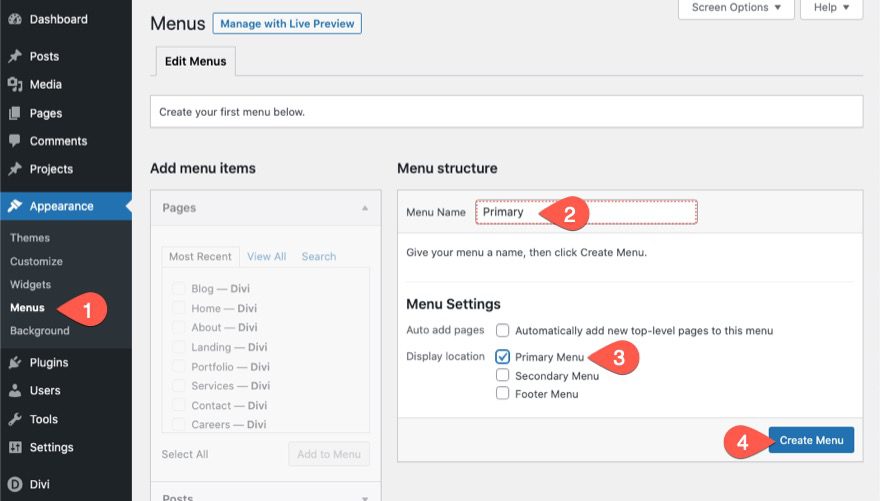
Once the new primary menu is created, we are ready to add our pages to the menu. Here’s how:
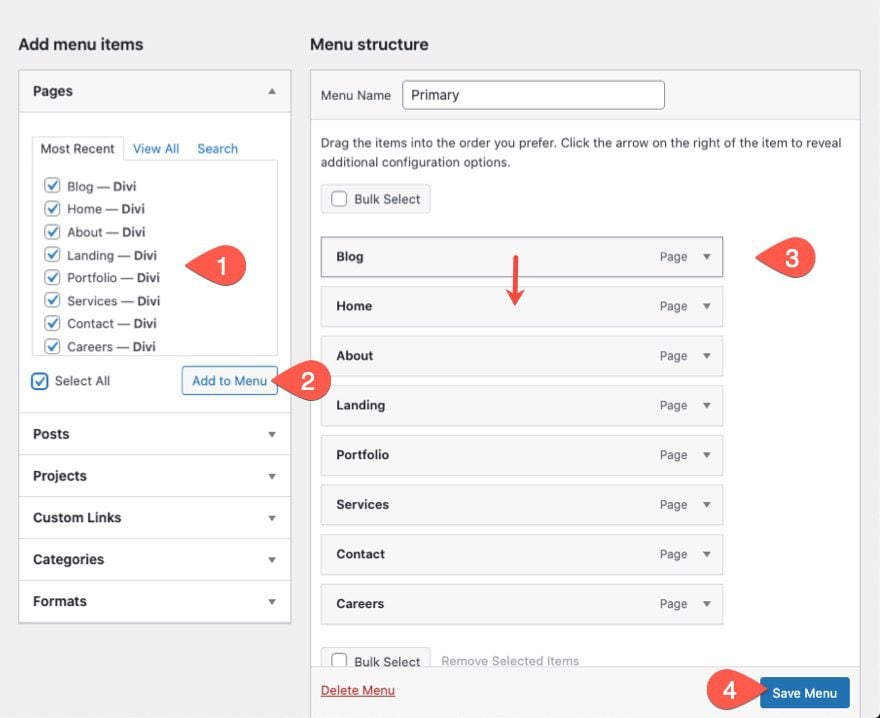
- Under the Add Menu items area on the left, you’ll see a list of pages that we have created under the Pages toggle. Select all of the pages.
- Click “Add to Menu”.
- Under the Menu Structure area, organize the menu items however you like using drag and drop.
- Then save the menu.
YouTube Tutorials (Installation Guide)
Explore our Video Guides for In-Depth Divi Layout Customization & Installation
Customer Support
If you encounter any issues, please don’t hesitate to get in touch with us.
Technical Support – Submit A Ticket
Email Support – support@dividream.com or dividream9@gmail.com
Custom Job Inquiry – dividream9@gmail.com
